Getting started
This walkthrough takes you from a new account to an assistant that answers your clients. The setup wizard does most of the work, and takes about ten minutes.
Prefer to watch first? Here is the same setup done by hand, from knowledge base to Telegram bot, in under a minute:
1. Create your account
- Open studio.aova.app and click Create one.
- Enter your name, email and a password (at least 8 characters, with a number, an uppercase and a lowercase letter).
- Tick the box to accept the Terms of Service (they include the Data Processing Addendum); the Privacy Policy explains how we use your data. We record the date and the version you accepted - you can see them under Settings.
- We email you a 6-digit code. Enter it and click Confirm.
You're signed in straight away. Your account starts on the Free plan, and your first project has already been created for you.
2. Run the setup wizard
After you confirm your email, the setup wizard opens. It has four steps. You can leave at any time with Save and exit. Until your first client writes in, Today shows Getting started, with a Start button for each step that is left.
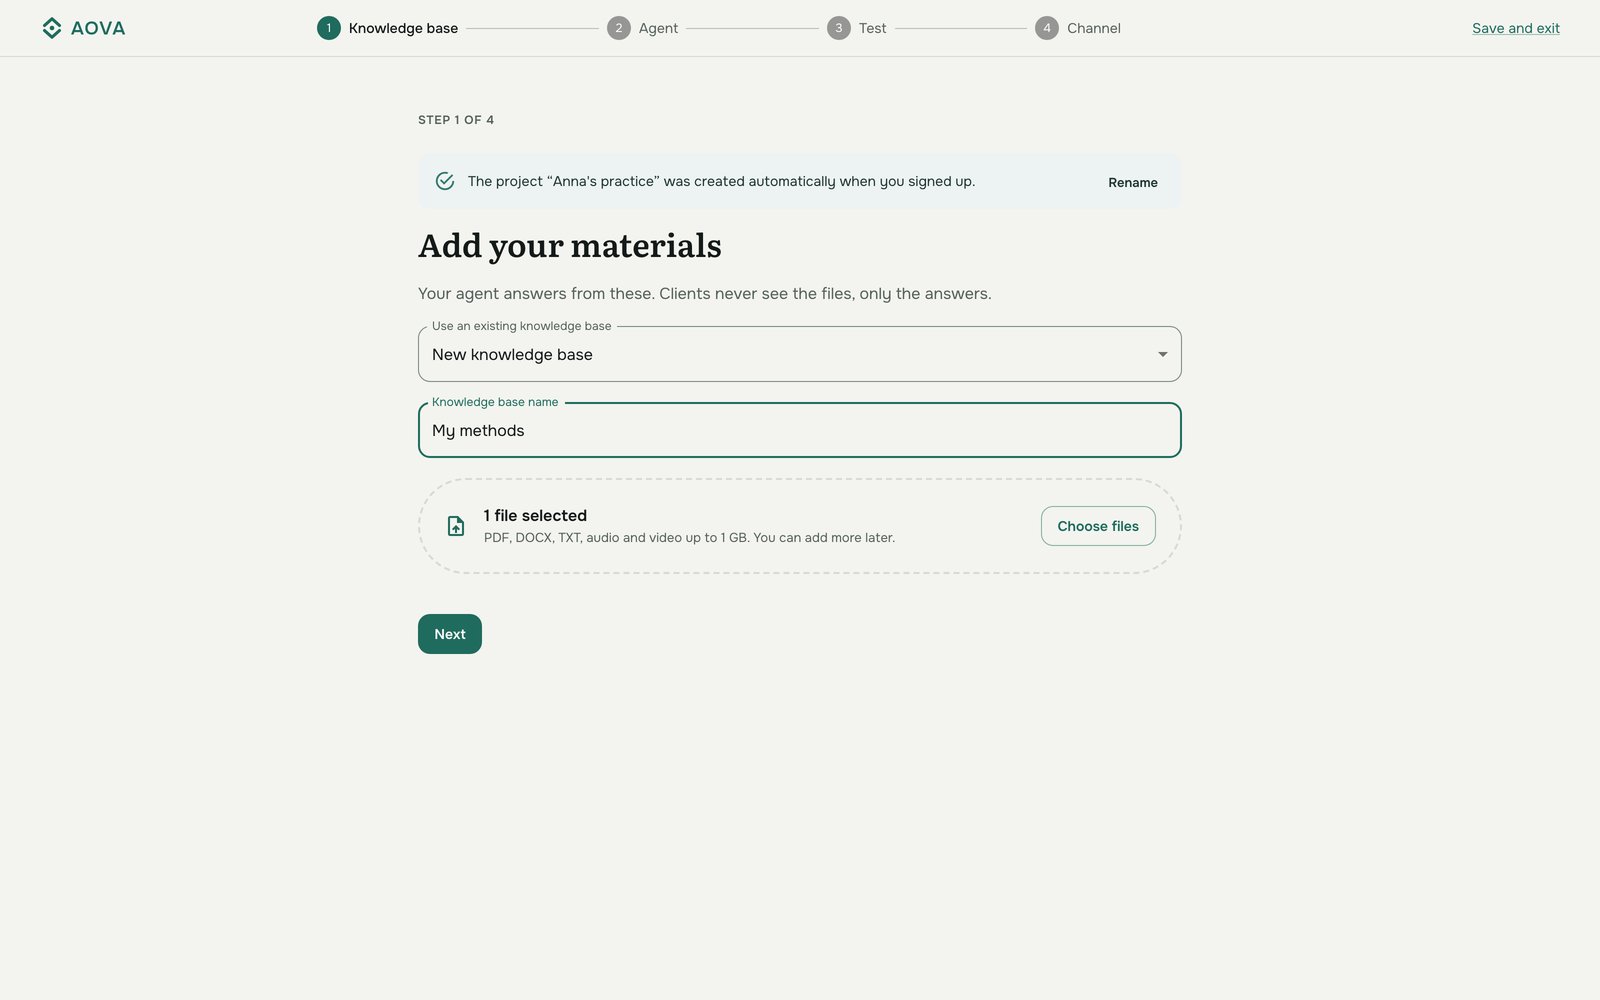
Add your materials
Name the knowledge base and choose the files your assistant should answer from: PDF, DOCX, TXT, or audio and video up to 1 GB. Recordings are transcribed to text automatically (see Add audio and video). Clients never see the files, only the answers based on them.
To rename the project the wizard is filling in, click Rename at the top.
Create the agent
Give the agent a name and click Create agent and test it. The agent starts with ready-made instructions. You can change its model, instructions and memory later; see Configure an agent.
Try it
Write a question the way a client would. The answer comes from the files you just uploaded. If an answer says it can't find something, the file may still be indexing; give it a minute and ask again.
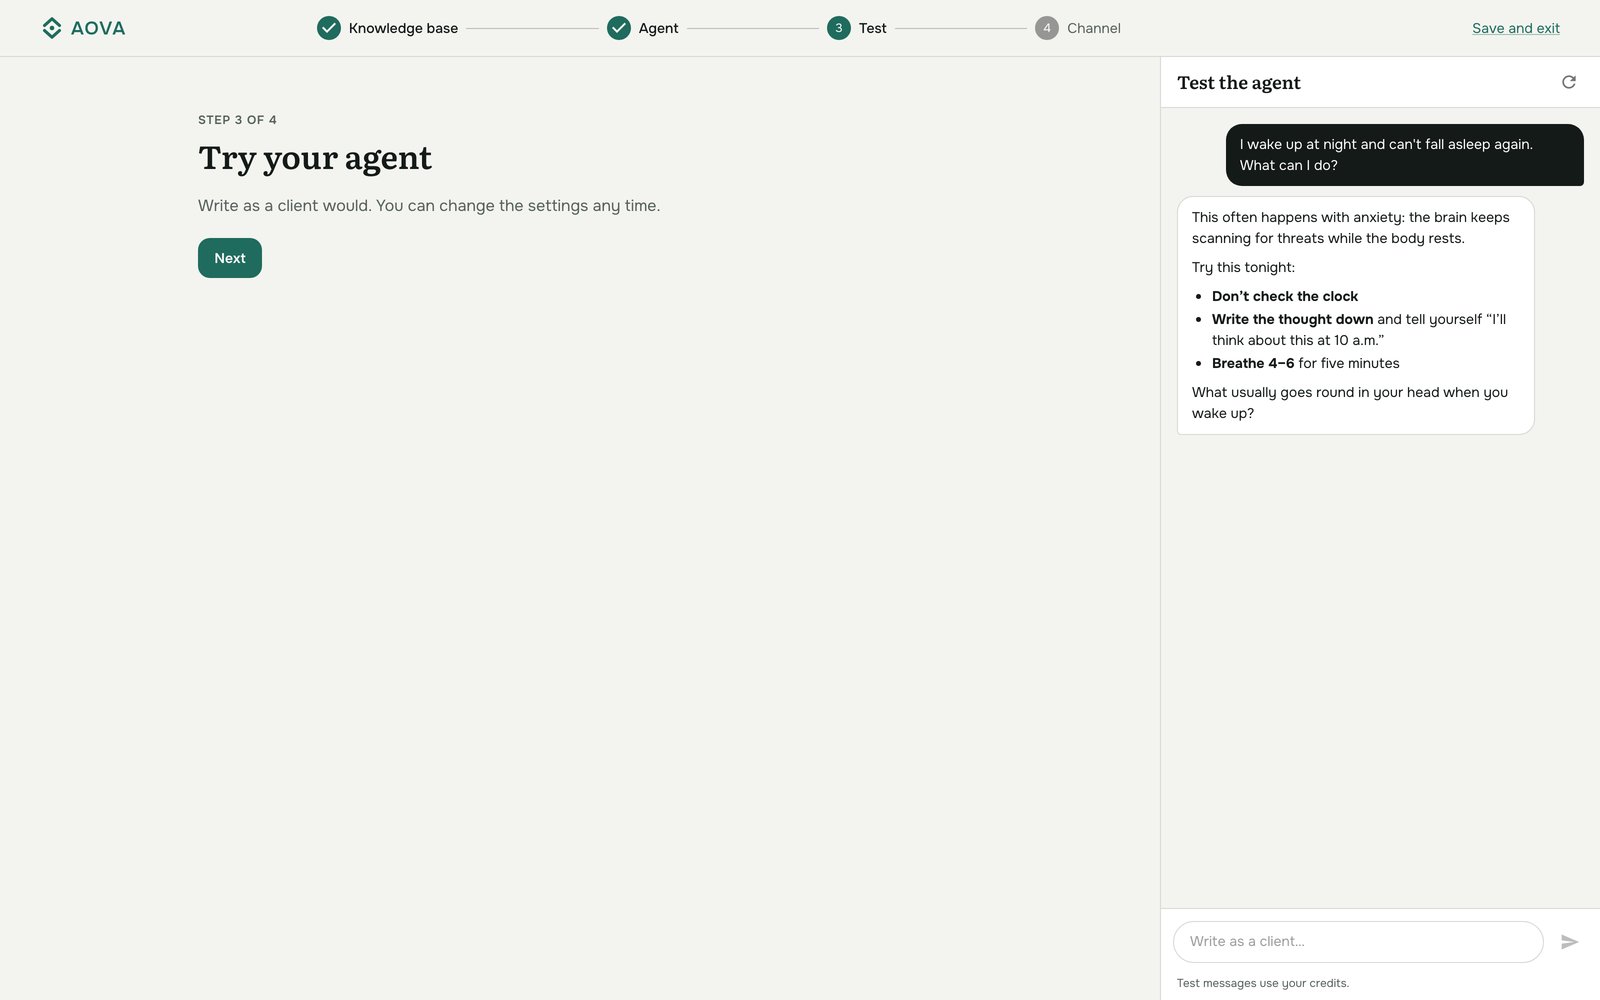
Test messages use credits, like real ones.
Choose where clients write
Pick a channel: Telegram, WhatsApp, Website widget or API, fill in its details and click Finish. Or click Skip for now and add a channel later.
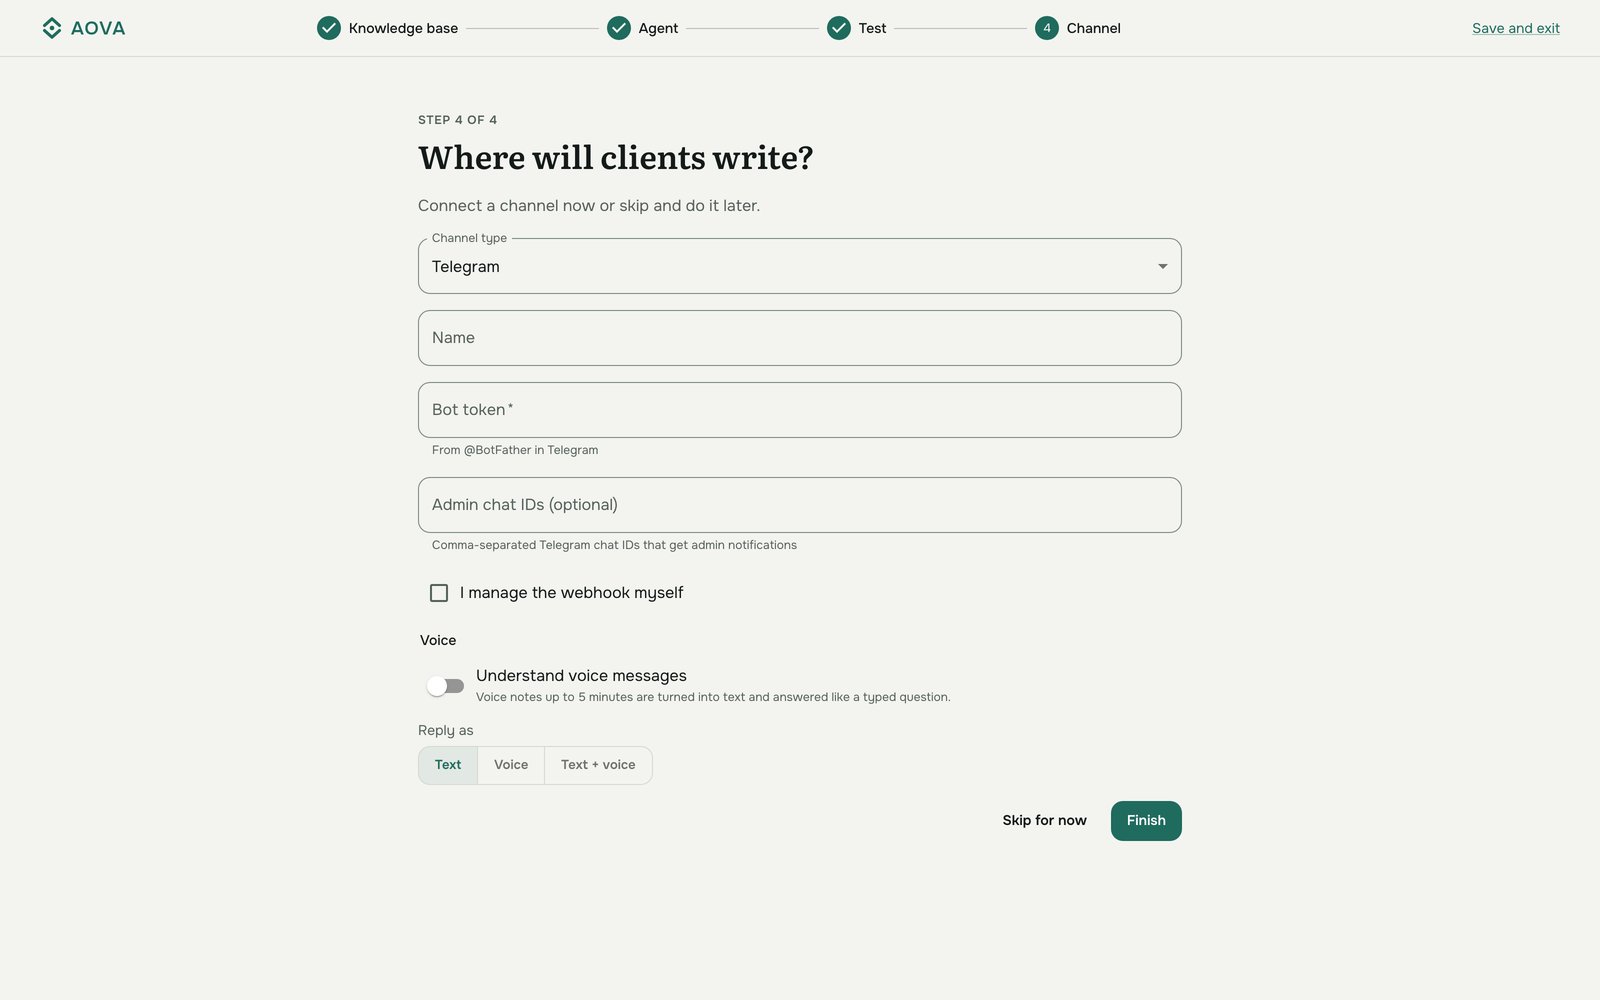
When you finish, you'll see Your assistant is live. Send it a message yourself to check.
3. Find your way around
AOVA Studio has a dark menu bar (the rail) on the left; on a phone it is a bar at the bottom:
- Today: what needs you, four numbers for the last 30 days and what has happened today.
- Inbox: conversations with your clients.
- Assistants: your assistants (agents), their channels and the questions they couldn't answer.
- Knowledge: your knowledge bases.
- Insights: statistics and where your credits went.
- Settings is at the bottom. Under it, your project's avatar opens the project switcher: your projects, All projects… and New project. On a phone the switcher is at the top left, next to the AOVA icon.
Inbox, Assistants and Knowledge show the project picked in the switcher. Today and Insights cover all your projects.
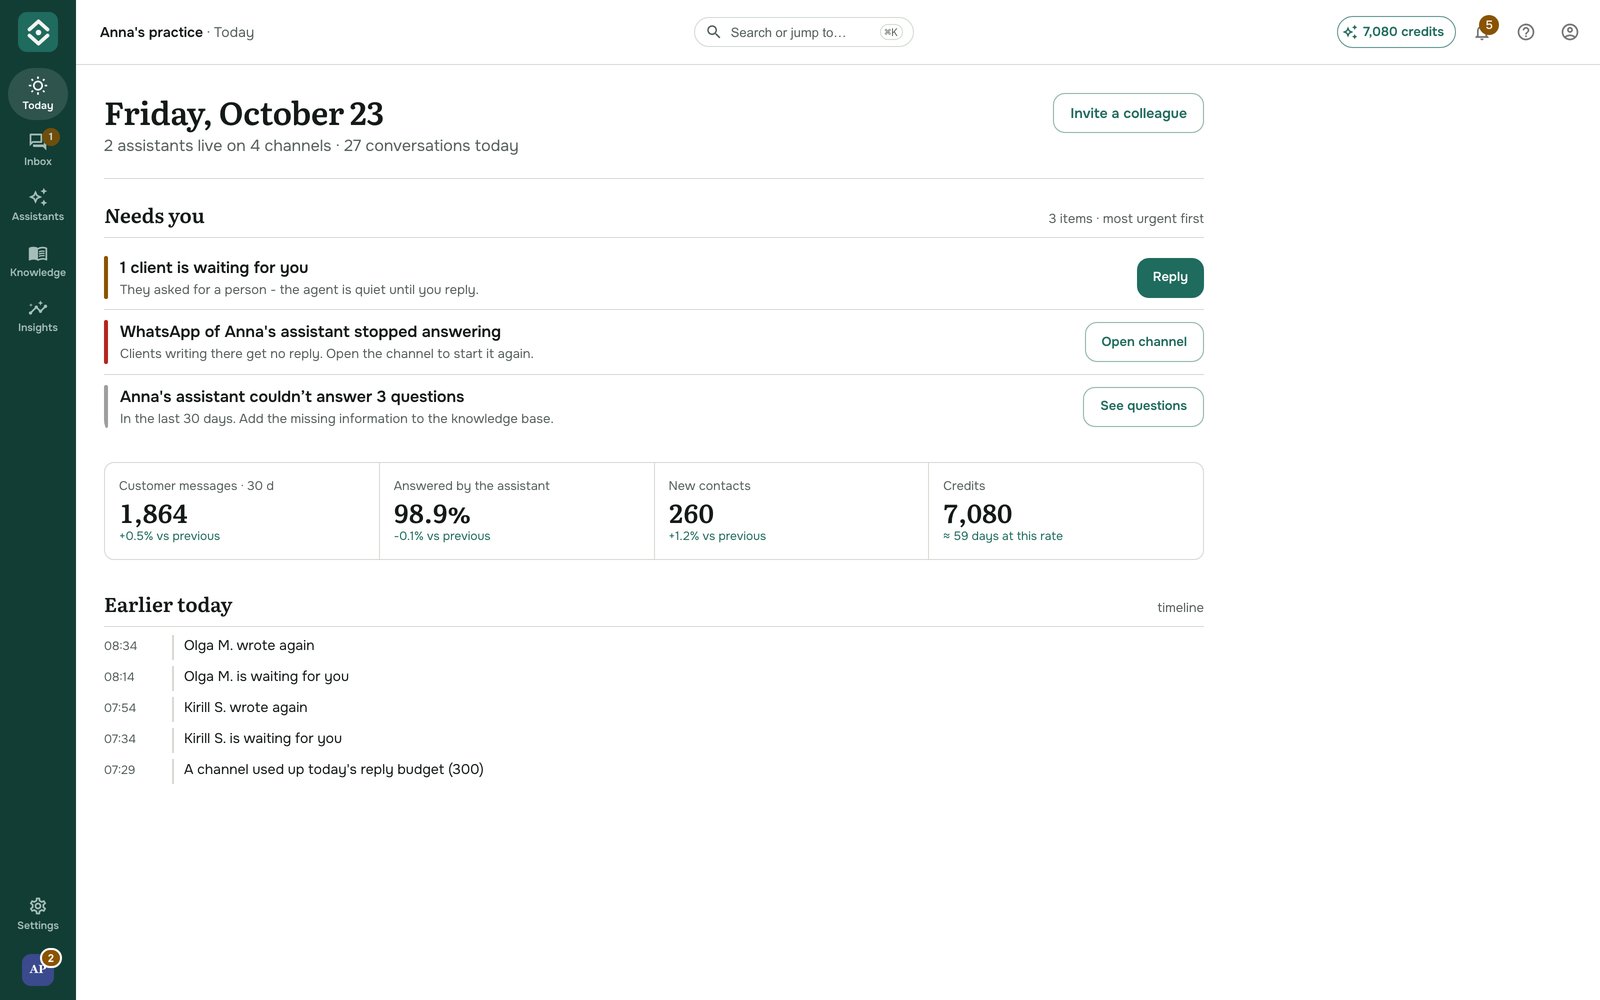
The top bar shows the project and the page you're on. Search or jump to… (or ⌘K, Ctrl+K on Windows) finds an assistant, knowledge base, project or page by name. On the right are your credit balance, the notifications bell, help (?) and the account menu, which switches the language (English or Russian) and between light and dark themes.
Getting help
The ? button at the top right opens Help:
- Guide for this page opens the guide for the screen you're on, for example Build a knowledge base on Knowledge.
- All documentation opens this site in the language you use AOVA in.
- Contact us opens a chat with the AOVA team.
Empty pages also have a Learn how link to the guide that explains them.
Next steps
- Build a knowledge base: folders, more files, and buttons under answers.
- Configure an agent: model, instructions, memory.
- Connect a Telegram channel or embed the chat widget.
- Read your conversations to see what clients ask.
- Prefer a walkthrough? The guide How to create an AI Telegram bot that answers from your documents goes from BotFather to a working bot in about ten minutes.