Getting started
This walkthrough takes you from a new account to talking with your first AI assistant.
1. Create a project
Projects are the top-level container for your work — everything else (knowledge bases, agents, channels) lives inside one.
- Sign in and open your dashboard.
- Go to Projects and click Add project.
- Give it a name (for example, "Support Bot") and an optional description.
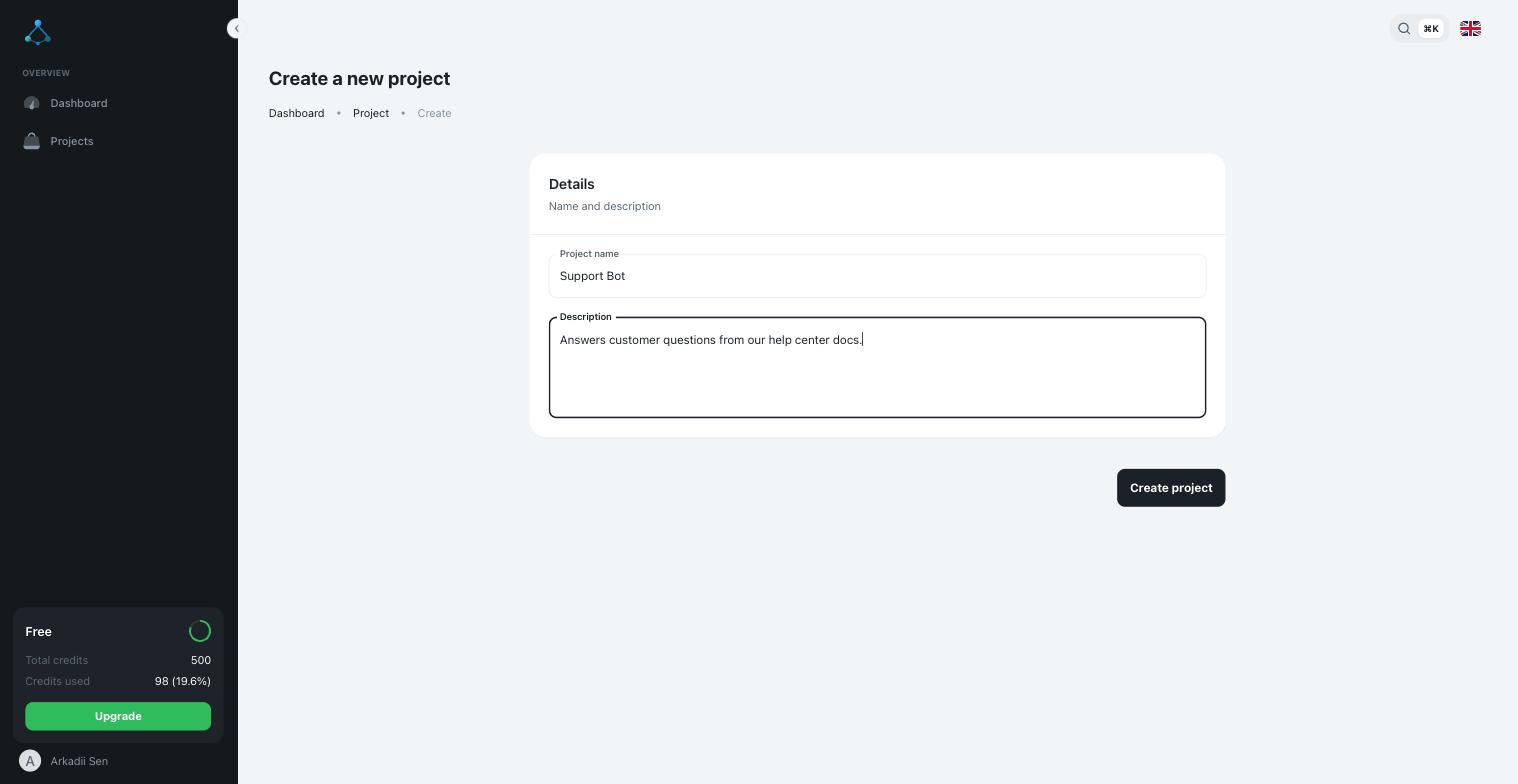
Once it's created, you land on the project page with two tabs: Knowledge bases and Agents — both empty for now.
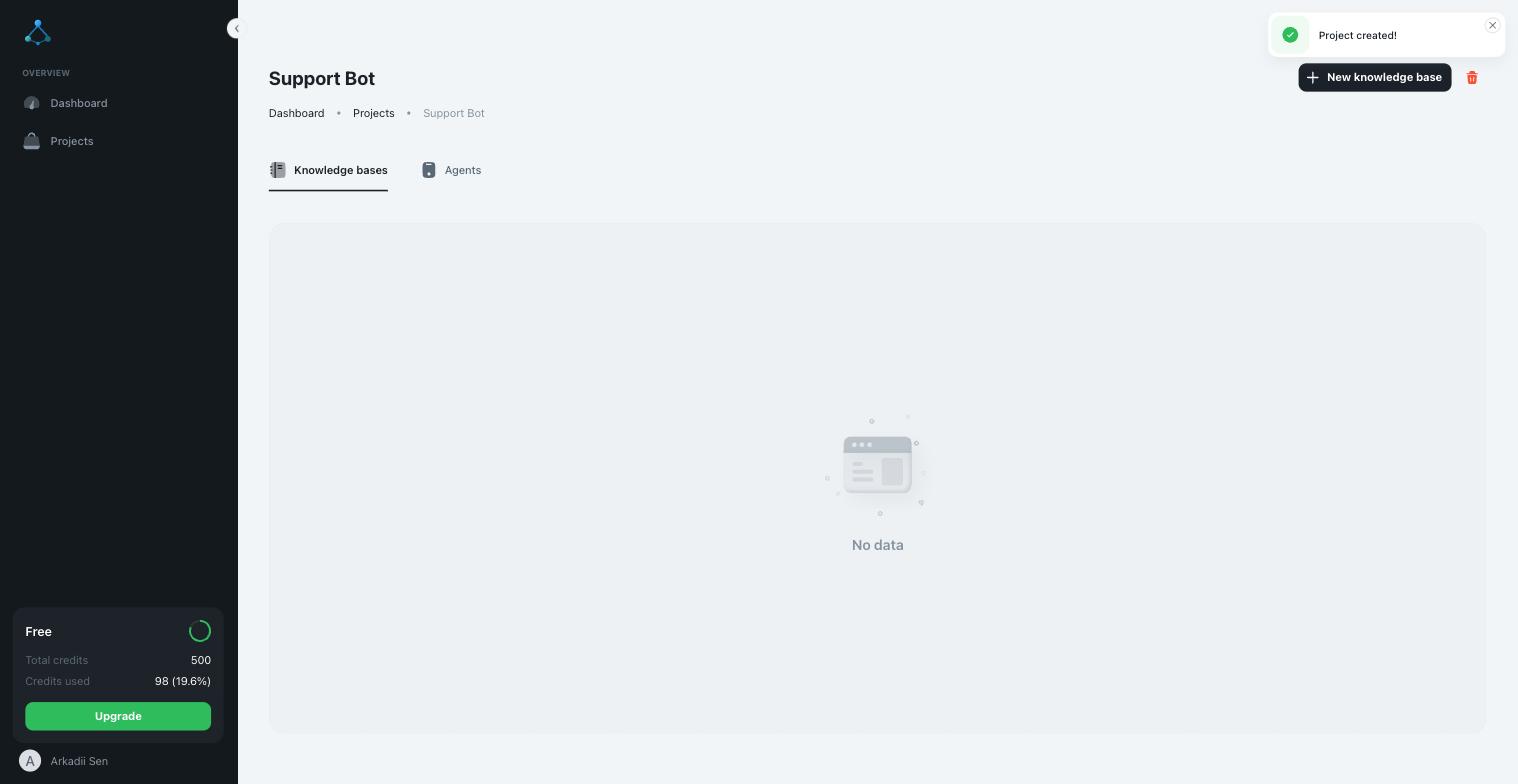
2. Add a knowledge base
A knowledge base is the set of documents your assistant can answer questions from.
- From the Knowledge bases tab, click New knowledge base, name it, and pick the project it belongs to.
- Open it and click Upload to add one or more files (PDFs, docs, or plain text work well for a first try; audio and video recordings are transcribed to text automatically — see Add audio and video).
- Give it a minute — newly uploaded files are processed and indexed in the background, so the status icon next to a fresh upload may still show as pending.
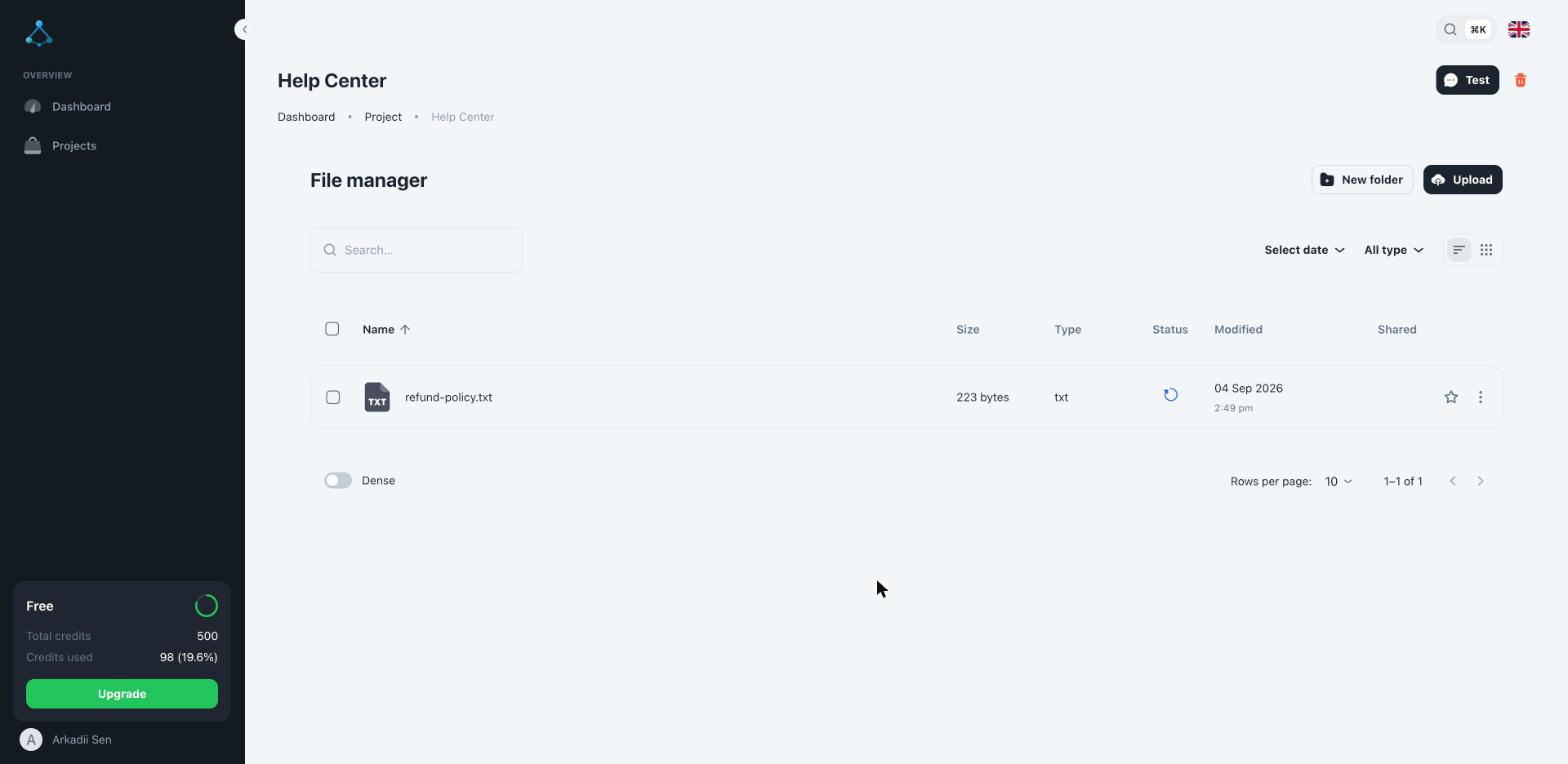
See Build a knowledge base for supported file types and folder organization.
3. Create an agent
An agent is the assistant itself: a model, connected to a knowledge base, with its own personality and instructions.
- From the Agents tab, click New agent.
- Give it a name, pick the knowledge base you just created, and choose a model.
- Optionally customize the prompt template (tone, scope, things it should refuse to answer).
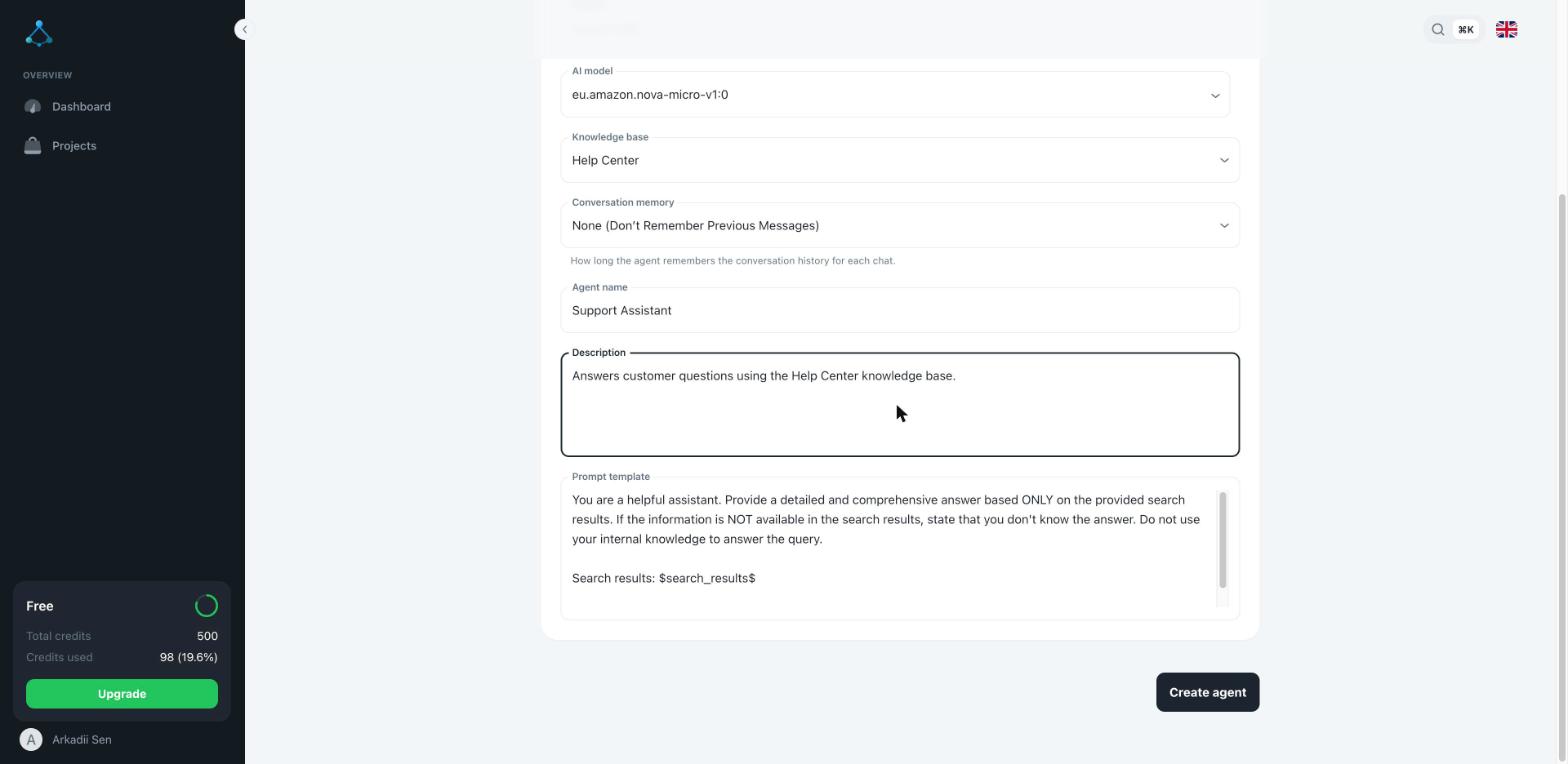
4. Talk to it
Click Test from the agent's page to open a chat preview, and ask it something answered by the document you uploaded. If the answer is wrong, missing, or slow to arrive, check that the file finished processing (step 2) before assuming the agent is at fault.
Next steps
- Connect a channel so people can reach your agent on Telegram, WhatsApp, or your own website.
- Read How your assistant answers questions to understand what it can and can't do.